 Español
  English (UK)
- Details
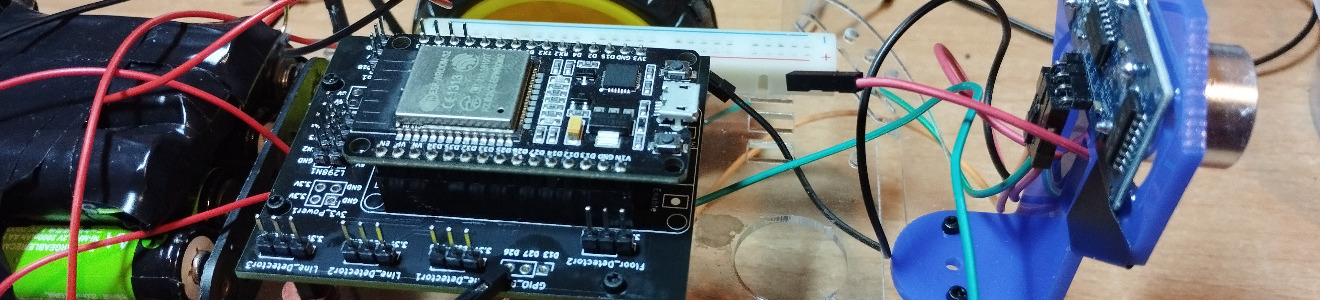
A few months ago, I decided to purchase a robotics kit to program it with the kids. I chose a widely used model that can even be self-assembled from an acrylic sheet or a similar material. The idea was to use it with an ESP32, as that's what I usually use (along with ESP8266 and lately Raspberry Pi Pico), and program it using Arduinoblocks since it offers programming identical to Scratch, which is great for young ones to experiment and learn.
- Details
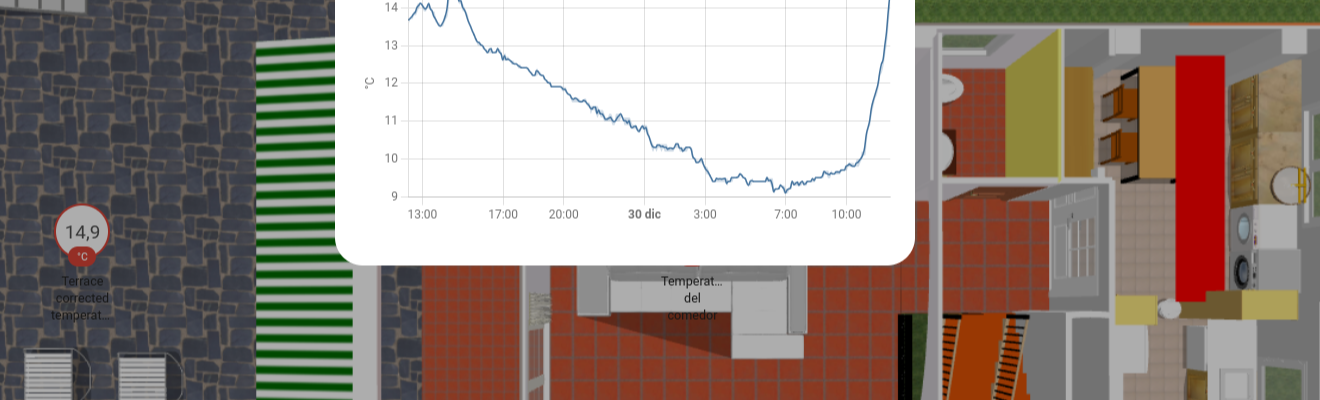
Following the resolution of certain power source challenges stemming from the batteries initially employed, I am happy to say that my external solar-powered weather station has been successfully restored to full functionality. This particular (MeteoHome based) weather station is equipped with a DHT22 sensor to get both temperature and humidity levels. Additionally, it features a BMP180 sensor, dedicated to monitoring atmospheric pressure with quite good accuracy.

- Details
During this summer vacation, I dedicated my time to upgrading my home automation server running Home Assistant. I swapped out my trusty SolidRun Cubox-i for a new Beelink mini PC. As I got more involved, I found myself diving back into the development of MeteoHome, making changes, and brewing up new ideas to enhance it.

- Details
After reading this article (ES) I started to think about creating my own sensor board. I searched which sensor to use and the SGP30 seemed a good option to me. Then, I did a few tests, I modified the code of another project and then I designed a PCB and later on I built two prototypes which are currently working in my house. The device uses a mqtt queue to send data to an IoT gateway (a minipc running Home Assistant in my case). In addition to that, there are three LEDs to show what is the current state of the air based on CO2 PPMs:
- Green light is shown if there are less than 600 PPM of CO2.
- Yellow light if there are between 600 and 800 PPM.
- Red when the CO2 is greater than 800.
The source code and the PCB design (made in Kicad) can be found here. In January, the project was certified by as open source hardware by the OSHWA
- Details
The Power Progress Community non profit association is trying to fund a new notebook based on a NXP T208x processor. This organization is accepting donations with the objective of collecting funds to establish a contract with Acube Systems to design the laptop's motherboard. The campaign started last Friday reached a 10% of its goal in 24h.
The objective is not only to build a notebook but to promote the use of Power technologies for home computing as well. We want to create an open computer and certify it as Open Source Hardware if possible. We are commited to distribute all the work performed in the scope of the project as open source, publishing documentation, designs etc.