 Español
  English (UK)
Some time ago, my family and I went to see the European NASCAR at the Cheste circuit. What initially was just a simple weekend plan ended up triggering a series of events that still keep me busy today. The kids were so fascinated that, when we got home, the first thing they said was, "Dad, we want NASCAR cars!" That day marked the beginning of a project that was supposed to be simple but quickly became complicated.
The first idea that came to mind was to make toy cars. Something simple, right? But I tend to make things more complicated for myself. So, instead of going with the easy option, I thought about building a slot car, a Scalextric car. That's when I began venturing into unknown territory, not fully realizing what I was getting into.
The search for the perfect model (and what I found on Thingiverse)
I dove into Thingiverse, hoping to find what I needed. Honestly, I was surprised by the amount of slot car-related material available, from small parts to complete chassis. The downside, though, is that while there’s plenty of material to repair cars, there aren’t many options if you're looking for something more specific, like a complete NASCAR body. Chassis were abundant, but the body was a real headache.
After a lot of searching, I came across a chassis that more or less met my expectations. The next step was to find a NASCAR car body, and that’s when things got really tricky. There were none designed specifically for slot cars. So, I found a 3D model intended more as a toy, a miniature car. And that’s where the real adventure began.
From screen to reality: the first steps
The next step was to print that chassis that I thought was suitable. I wanted to see how it behaved, whether it was sturdy, and what kind of motor I could fit. Although I could have done the measurements in a program like FreeCAD, having the physical model in my hand allowed me to immediately spot a problem: it wasn't as robust as I had hoped. It needed reinforcements. And suddenly, I found myself tasked with redesigning that part.
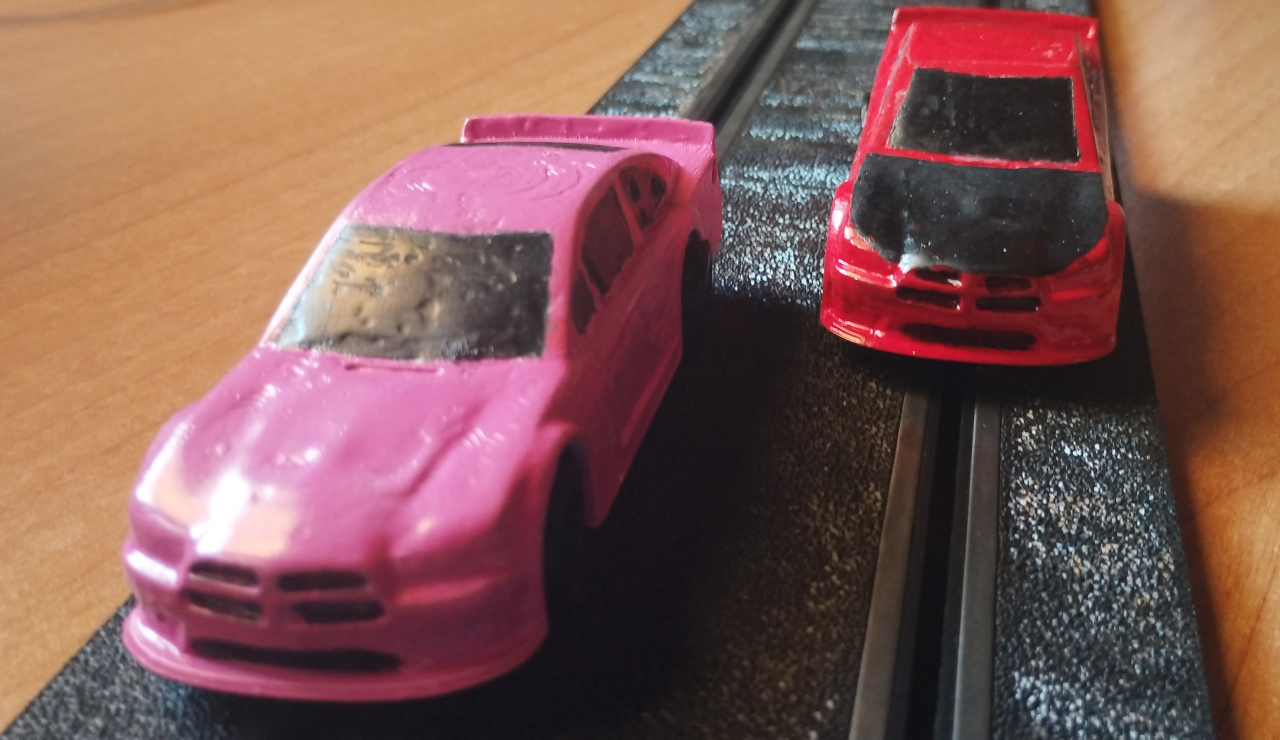
At the same time, I started thinking about the car body. This is where it would be decided whether all the effort would be worth it. If I could make a good body, everything else would fall into place little by little. Then, I found the body of a Dodge that ran in NASCAR in 2013. But of course, I’m no professional designer. I managed to hollow out the body in FreeCAD using basic shapes and subtraction operations, and with some patience, I finally got a decent shell. I added the four screw mounting points, and with that, I had something to work with.
The transmission system and the complications that came with it
The next challenge was to create a transmission system. For me, this was the part where I really overcomplicated things. Looking back, I probably should have opted for an existing commercial solution. But instead, I dove into designing the entire system, including the gears and the wheel axle, aiming to make all the parts easy to find and as inexpensive as possible.
That’s when AliExpress came into play. I bought some steel rods and dedicated myself to designing my own wheels based on the Dodge model I had found. The goal was for the wheels to fit perfectly around the diameter of the steel rods.
For the motor, I used one of those found in electronics and Arduino robot projects. My idea was simple: use both the motor and one of the included gears. With this, I started the first electrical tests, and at least the motor seemed to work fairly well.
The guide dilemma and constant redesigning
Next up was dealing with the car guides, a key component for getting electricity to the motor. After a lot of back and forth, I ended up copying part of the guide design from a car I had at home.
And at that point, I realized that my chassis no longer fit with the system I had designed. So, I went back to the drawing board, creating more versions of the chassis until I finally got one that worked with the new electrical drive system. It was a process of trial and error, but in the end, I managed to get something that more or less worked.
The final assembly and track tests
With all the parts ready, it was time to assemble the car. On the outside, the body didn’t turn out as well as I’d hoped. It was my first experience working with epoxy, and between the application, sanding, priming, and painting, I lost many of the original details. But there it was: my first slot car, built almost entirely from scratch.
When I took it to the track, I realized that things weren’t going to be wrapped up so quickly. Without a magnet, the car skidded quite a bit, and the gear system sometimes failed, affecting contact with the motor. But surprisingly, it was a lot of fun to drive because of that. With little grip, the car reacted unpredictably, making it feel much more realistic, like a car without traction control.
What I learned and the future of the project
In the end, it was clear that the car had some design flaws. The lack of a magnet and a slightly unbalanced weight distribution made it hard to handle. However, simply adding a bit of weight to the rear made it much more playable.
For now, I’ve put the project on hold. I’m considering making a new version where I leave space for a rear magnet, which would probably greatly improve the handling.